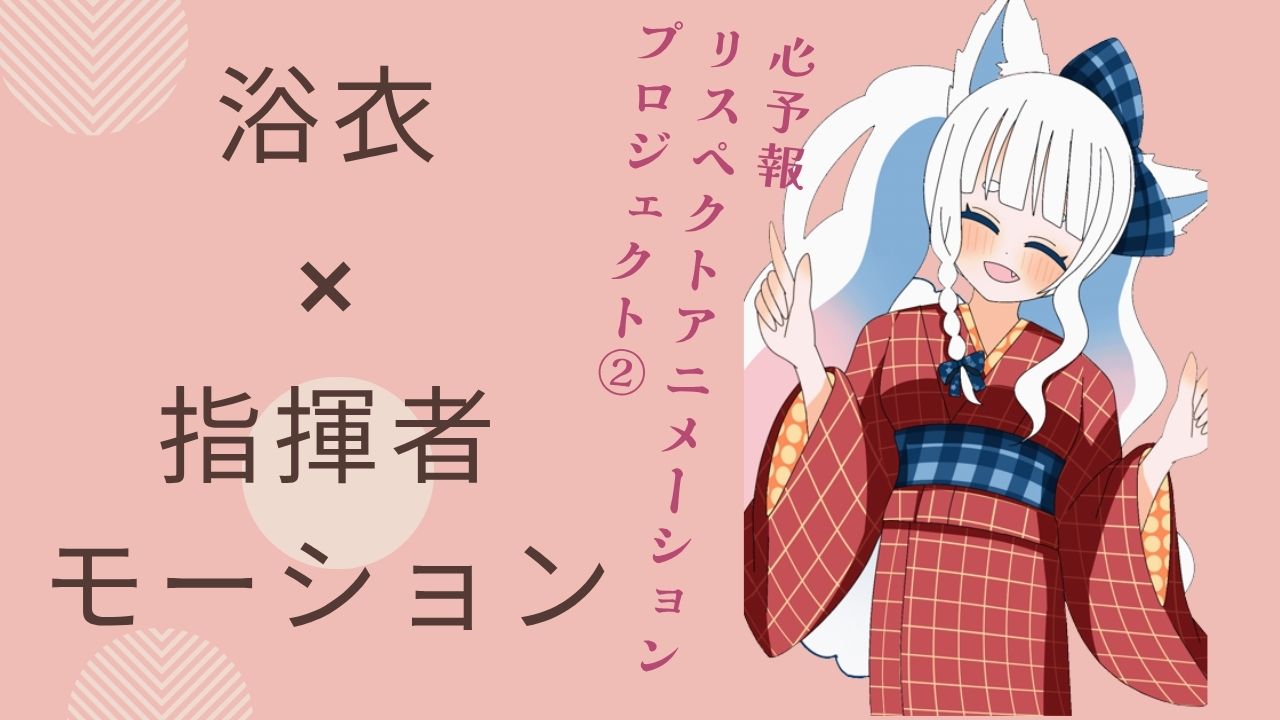
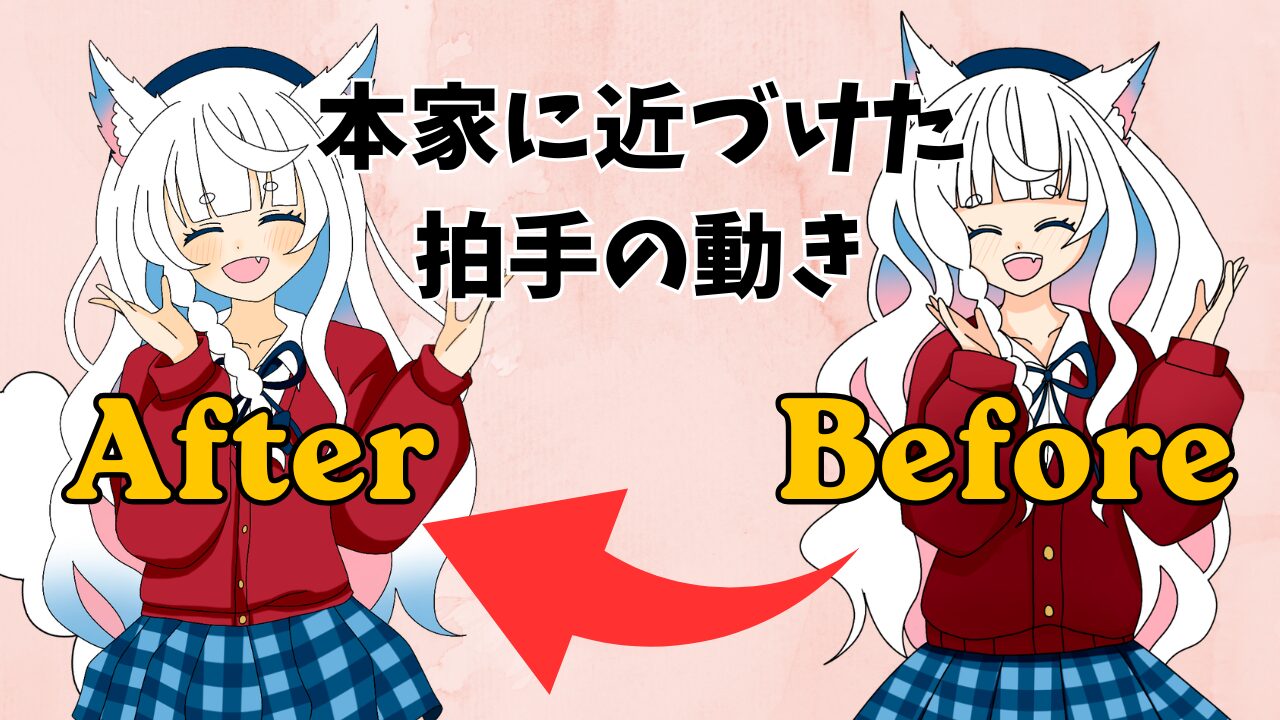
[Heart Forecast ②] Recreating the conductor's motion from Heart Forecast in a yukata! Frame-by-frame improvement points for achieving natural movement and behind-the-scenes production.
Pochi
Reading in the sun and reading in the rain.
The hand movements in anime are,Have you ever felt like something was "just a little off" for some reason?
While creating my animation inspired by the "Heart Forecast" series, I was constantly troubled by the unnatural movement of the hands.
The reason is actually “"Lack of observation of short videos"”。
This time,How to accurately observe the original movements by frame-by-frame analysis of YouTube ShortsI've compiled it here.
It will dramatically improve the quality of your animation, so please give it a try.
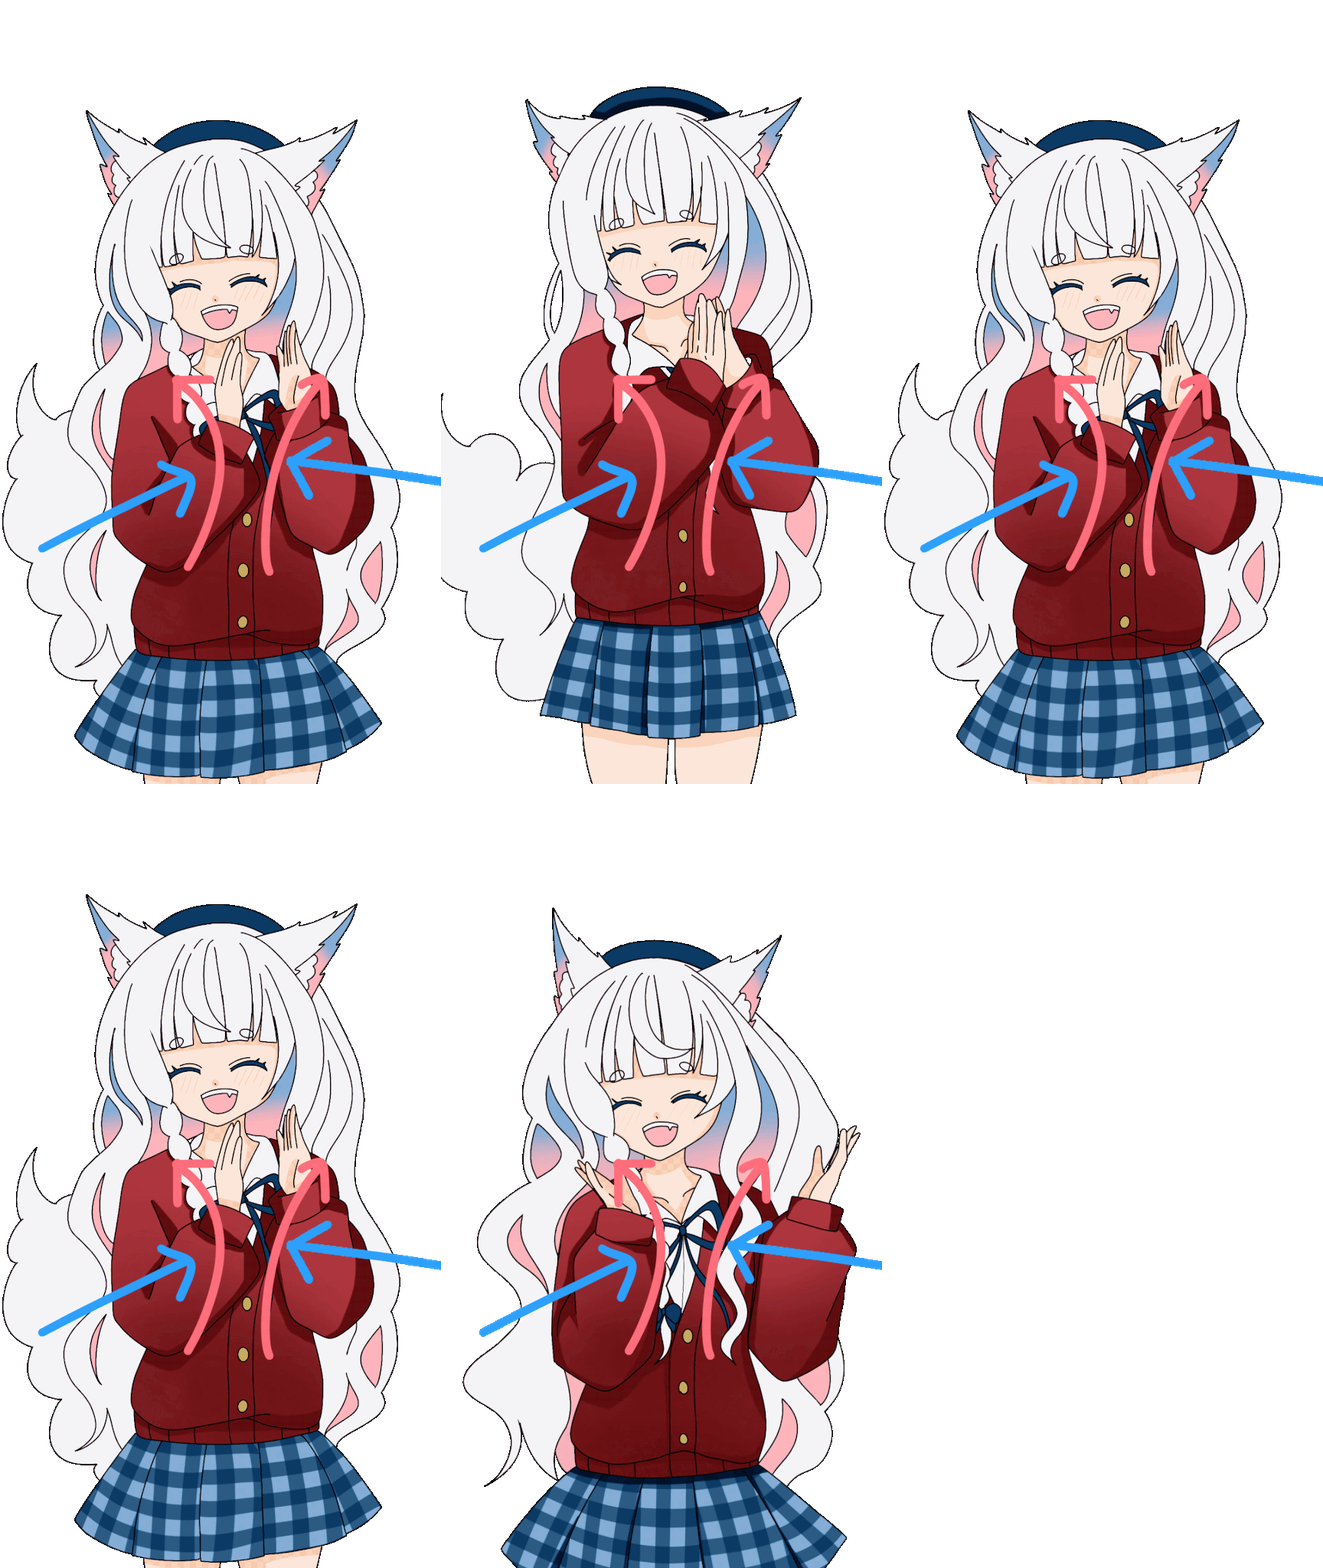
In the animation I drew, the hand movements were linear (blue arrows).
However, the original artist's movements involve using the wrist flexibly.A circular trajectory (pink arrow)I am drawing this.
In order to bridge this gap,Observe the original source's actions carefully.It is essential.
That's where this comes in handy"frame-by-frame playback"Is.
Up until now, I've been creating animations by diligently observing things with my eyes.
However, the result was"Something's not right..."This led to a feeling of unease.
When I consulted with an AI at that time,There is a way to play YouTube Shorts frame by frame.I learned that.
This time, I will explain that method in an easy-to-understand way.
First and foremost,
Please keep that point in mind.
You might be thinking, "Then I can't use short anime as a reference!", but there's no need to give up yet.
Short videoConvert to horizontal video (regular YouTube video)This will enable frame-by-frame playback.
The procedure is explained below.
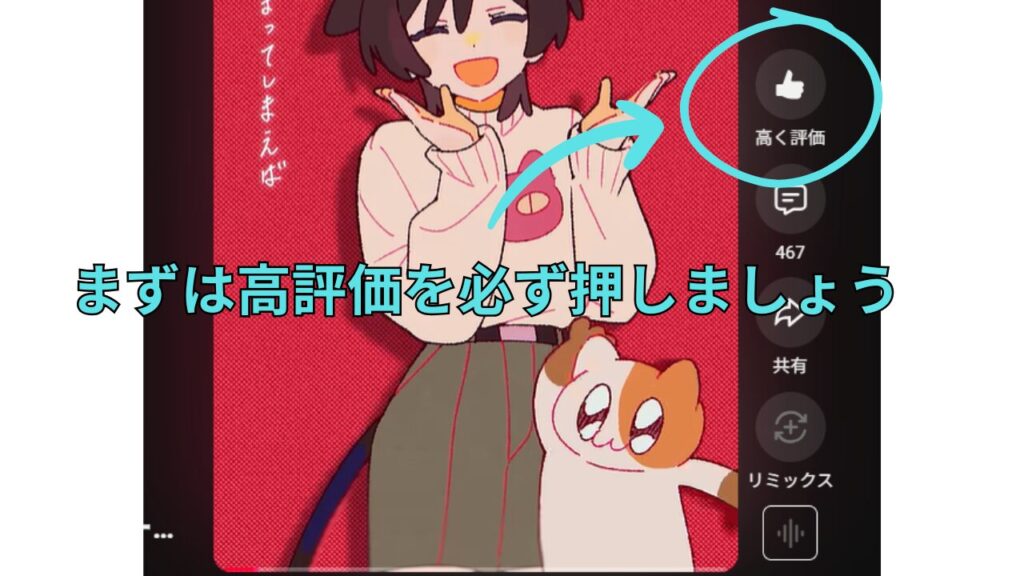
First of all, as a sign of respect to the original creator,I'll press the like button.。
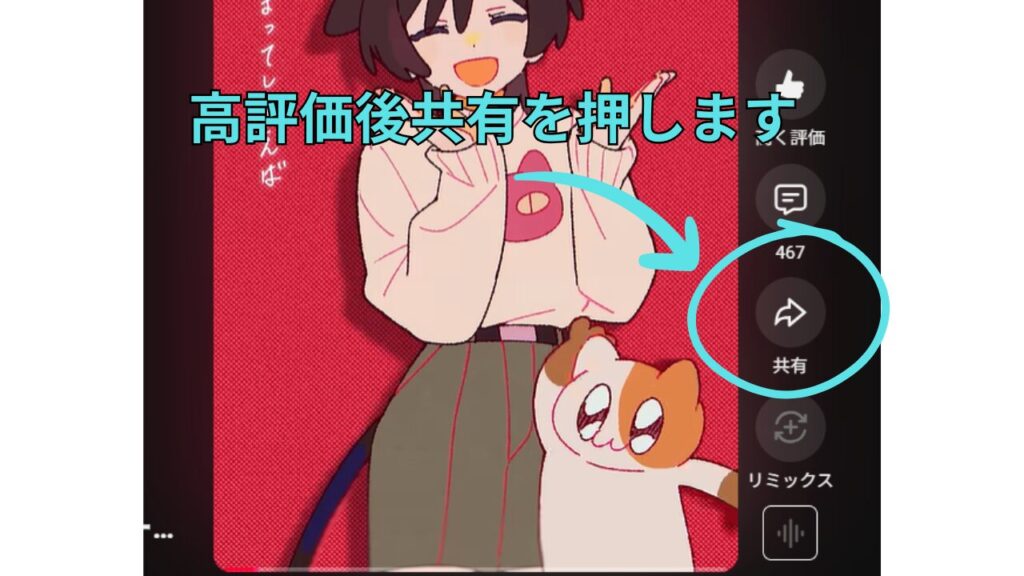
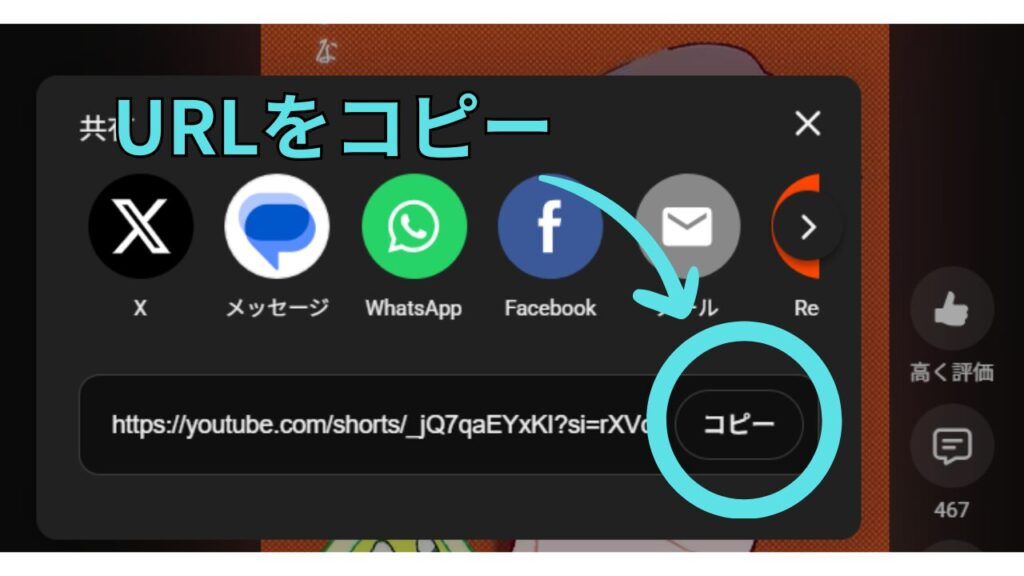
next "Share" button → Copy URL Select one.
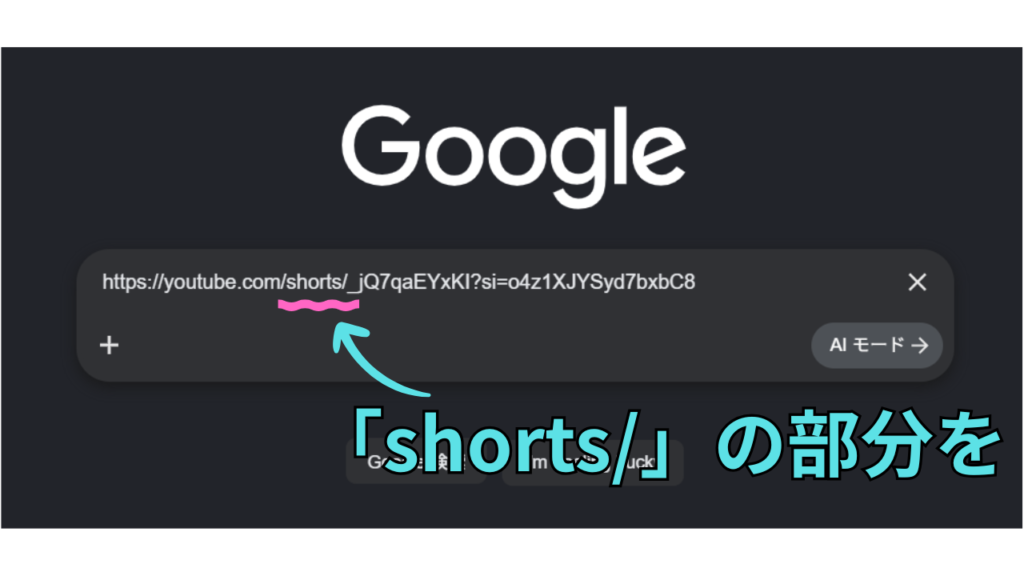
Paste the copied URL into the search bar.
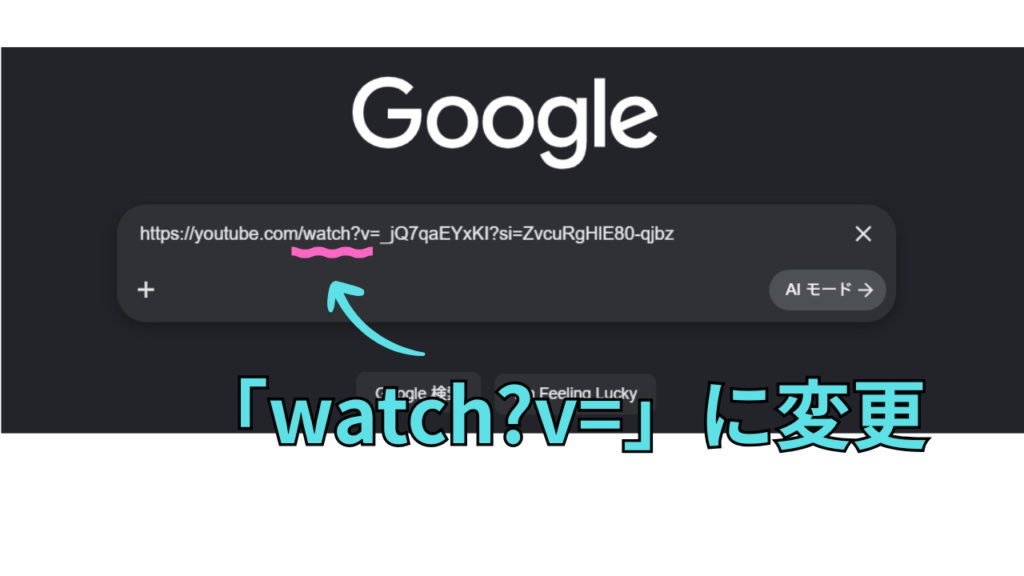
and, Replace the "shorts/" part of the URL with "watch?v=".ChangeI will.
This will allow short videos to open as horizontal videos.
Once the video is in landscape mode, you can advance frame by frame using the following keys.
Press the "." key to advance one frame.
Press the "," key to go back one frame.
This allows for detailed observation of the hand's trajectory, speed, angle, and other parameters.
When viewed frame by frame, the movements that we had previously "just vaguely noticed" become clear.It becomes possible to understand it as a concrete trajectory.Therefore, the quality of the animation will improve dramatically.
Using the method I've described, you can accurately observe the original artist's movements even in short videos.
Personally, using frame-by-frame animation solved my problem of "incorrect hand movements," allowing me to create animations that are closer to the original.
I've also explained it in a video, so I hope you find it helpful.
I will continue to utilize stop-motion animation to create even higher-quality, respectful animations.
This time too, my usual partner iPad Air × Procreate × Apple Pencil It was created using a combination of these elements.
The Apple Pencil makes it easy to draw even in small areas, and I feel it's a really good match for my drawing style.
・・・・・・・・・・・・・・・・・・・・・・・・
If you found this article helpful and would like to support it,
Receiving encouragement from OFUSE is very motivating.
Your support will be instrumental in creating illustrations and updating my blog.
Thank you very much for reading to the end.
Thanks to everyone who always reads my work, I can continue to create.
I look forward to your continued support.